This tutorial will focus on explaining how to draw things from noise functions in Processing, and then will present an automatic way to produce GIFs that loop well from a noise-based drawing.
It will explain how to obtain the following GIFs with the same animation technique :


Most of my latest gifs have all used this same trick I will present here, so I thought it was worth sharing it.
About noise functions
First of all let’s explain a little bit noise functions.
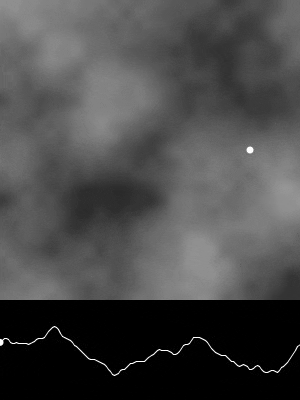
Processing has a function noise() that produces values between 0 and 1, centered on 0.5 given some inputs. Those values are random, but will always be the same with the same inputs on the same noise seed (fixed when the program is launched). Another property is that noise is continuous : for close inputs you get nearly the same value. Computing noise values is fast, you don’t have to compute previous values. The noise function of Processing is sometimes called Perlin noise.
Let’s show with a quite short code what noise() gives us :
void setup(){
  size(500,500);
  background(0);
  stroke(255);
  noFill();
}

void draw(){
  float scale = 0.03;

  beginShape();
  for(int x = 0; x<width;x++){
    float y = height*noise(scale*x);
    vertex(x,y);
  }
  endShape();
}
Result :

The parameter scale is used because without it the values changed too fast.
Beware that the noise function is symmetrical (noise(x) = noise(-x)).
Everytime the sketch is launched, the curve looks different.
You can have the noise functions to give always the same result by using Processing’s function noiseSeed. Also check out the function noiseDetail to change the parameters of the noise function (for example its smoothness).
Here’s a trick : To draw another independant curve at the same time one can just take the noise values far away from previously (use noise(scale*x) first, then noise(scale*x + 1000) ).
That was 1-dimensional noise. 2-dimensional noise takes 2 float values and returns a value between 0 and 1. We can represent that by brightness level on a 2D picture.
void setup(){
  size(500,500);
  background(0);
  stroke(255);
  noFill();
}

void draw(){
  float scale = 0.01;

  for(int x = 0; x<width;x++){
    for(int y = 0; y<height;y++){
      stroke(255*noise(scale*x,scale*y));
      point(x,y);
    }
  }
}
Result :

One way to visualize 3D noise is to use time as third dimension…
void setup(){
  size(500,500);
  background(0);
  stroke(255);
  noFill();
  noiseDetail(5);
}

void draw(){
  background(0);
  float scale = 0.01;

  loadPixels();
  for(int x = 0; x<width;x++){
    for(int y = 0; y<height;y++){
      float col = 255*noise(scale*x,scale*y,10*scale*frameCount);
      pixels[x + width*y] = color(col);
    }
  }
  updatePixels();

  if(frameCount<=50){
    saveFrame("tuto###.png");
  }
}
Result :

We’re getting closer to making animated GIFs that loop well but this doesn’t loop well so far.
To make it loop we’ll need 4-dimensional noise. Processing’s noise is limited to 3D so I’ll introduce openSimplex noise (code by Kurt Spencer). To use it paste this code in another tab of your Processing sketch.
openSimplex noise is similar to Perlin noise but returns values between -1 and 1 (centered on 0).
openSimplex noise can be used this way (back to the first example) :
OpenSimplexNoise noise;

void setup(){
  size(500,500);
  background(0);
  stroke(255);
  noFill();

  noise = new OpenSimplexNoise();
}

void draw(){
  float scale = 0.03;

  beginShape();
  for(int x = 0; x<width;x++){
    float ns = (float)noise.eval(scale*x,0);
    float y = map(ns,-1,1,0,height);
    vertex(x,y);
  }
  endShape();
}
Result :

I actually used 2D noise here with 0 as second input because the implementation of openSimplex noise I have only has 2D,3D and 4D noise.
Before using my trick to make loopy animations, let’s draw something more interesting/different from noise…
Let’s use a threshold on the noise to draw pixels in black or white :
OpenSimplexNoise noise;

void setup(){
  size(500,500);
  background(0);
  stroke(255);
  noFill();

  noise = new OpenSimplexNoise();
}

void draw(){
  background(0);
  float scale = 0.02;

  loadPixels();
  for(int x = 0; x<width;x++){
    for(int y = 0; y<height;y++){
      boolean b = (float)noise.eval(scale*x,scale*y) > 0;
      float col = b?255:0;
      pixels[x + width*y] = color(col);
    }
  }
  updatePixels();

  saveFrame("tuto3.jpg");
}
Update : there may be a wordpress/HTML bug to display the above code, but you can find it here.
Result :

How to animate noisy stuff with a nice trick
Now here’s the trick to animate this with a perfect loop, a trick that will work with anything that uses 1D or 2D noise…
Replace noise.eval(scale*x,scale*y) by noise.eval(scale*x,scale*y,radius*cos(TWO_PI*t),radius*sin(TWO_PI*t)).
We make a circle in the two new dimensions of noise space to make the animation loop perfectly. It’s hard to have a graphical interpretation with 2D noise but from 1D noise, (noise.eval(scale*x,radius*cos(TWO_PI*t),radius*sin(TWO_PI*t))) would mean to take noise values on a line for each frame, and move this line along a cylinder as time increases…
So let’s apply this to the thresholded drawing :
OpenSimplexNoise noise;

void setup(){
  size(500,500);
  background(0);
  stroke(255);
  noFill();

  noise = new OpenSimplexNoise();
}

int numFrames = 75;

float radius = 1.0;

void draw(){
  float t = 1.0*frameCount/numFrames;

  background(0);
  float scale = 0.02;

  loadPixels();
  for(int x = 0; x<width;x++){
    for(int y = 0; y<height;y++){
      boolean b = (float)noise.eval(scale*x,scale*y,radius*cos(TWO_PI*t),radius*sin(TWO_PI*t)) > 0;
      float col = b?255:0;
      pixels[x + width*y] = color(col);
    }
  }
  updatePixels();

  println(t);

  if(frameCount<=numFrames){
    saveFrame("tuto2###.gif");
  }
  if(frameCount == numFrames){
    println("finished");
    stop();
  }
}
Update : there may be a wordpress/HTML bug to display the above code, but you can find it here.
Result :

radius is a parameter that will control how much things will change in the animation.
We can animate the curve example with the same technique :
OpenSimplexNoise noise;

void setup(){
  size(500,500);
  background(0);
  stroke(255);
  noFill();

  noise = new OpenSimplexNoise();
}

int numFrames = 150;

float radius = 1.5;

void draw(){
  float t = 1.0*frameCount/numFrames;

  background(0);
  float scale = 0.02;

  beginShape();
  for(int x = 0; x<width;x++){
    float ns = (float)noise.eval(scale*x,radius*cos(TWO_PI*t),radius*sin(TWO_PI*t));
    float y = map(ns,-1,1,0,height);
    vertex(x,y);
  }
  endShape();

  println(t);

  if(frameCount<=numFrames){
    saveFrame("tuto2###.jpg");
  }
  if(frameCount == numFrames){
    println("finished");
    stop();
  }
}
Result :

Let’s apply the technique to the previous noisy brightness example. Here the result will look blurred because the implementation of openSimplex noise used here doesn’t have a lot of details (but that smoothness looks nice sometimes 🙂 ).
Code :
OpenSimplexNoise noise;

void setup(){
  size(500,500);
  background(0);
  stroke(255);
  noFill();

  noise = new OpenSimplexNoise();
}

int numFrames = 75;

float radius = 1.5;

void draw(){
  float t = 1.0*frameCount/numFrames;

  background(0);
  float scale = 0.02;

  loadPixels();
  for(int x = 0; x<width;x++){
    for(int y = 0; y<height;y++){
      float ns = (float)noise.eval(scale*x,scale*y,radius*cos(TWO_PI*t),radius*sin(TWO_PI*t));
      float col = map(ns,-1,1,0,255);
      pixels[x + width*y] = color(col);
    }
  }
  updatePixels();

  println(t);

  if(frameCount<=numFrames){
    saveFrame("tuto3###.jpg");
  }
  if(frameCount == numFrames){
    println("finished");
    stop();
  }
}
Result :

Now you must be convinced that every Processing drawing that uses 1D or 2D noise can be turned into a perfectly looping animation easily. I haven’t spent time explaining where the trick comes from, but I hope it will seem natural to you after thinking about it for a while.
I’m going to explain how I obtained some more complex and interesting gifs.
I’ll start with that one :

White points are randomly generated inside a circle. Each one follows an horizontal and a vertical displacement based on 2D noise. Also the intensity of the displacement becomes 0 near the border (near the circle). The animation is done just by using the same 4D noise technique. The GIF also uses motion blur from @beesandbombs.
Here is the code to generate the frames of the GIF : noisetraj.pde
Note that drawCurve just draws a circle but it was coded so that it could be easily disorted too.
Let’s move to another example…

Here some points start from a grid and draw their trajectory following a noise-based field. This field changes using the 4D-noise technique.
(Code)

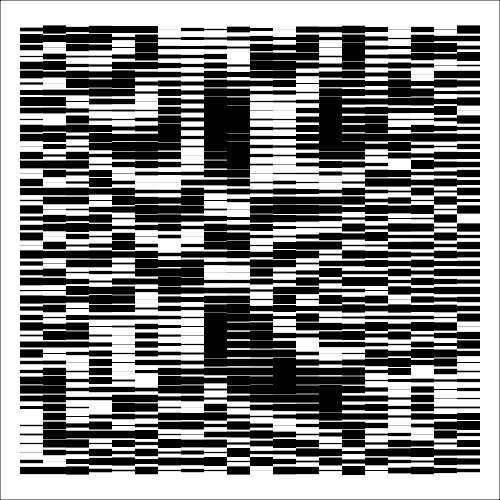
Here a threshold on 2D noise determines if it will show ‘/’ or ‘\’. Animated with 4D noise once again.
(Code)

The lines represent a 2D field based on 2D noise. Once again animated with the same trick.
(Code)

That one is a little complex to do. Basically it thresholds 1D noise curves to determine if it will draw in black or white. Parameters to animate each column are different. A big disk is drawn in the center in exclusion mode.
(Code for something similar)

Each line uses independant noise values from 1D noise, animated with 3D noise with the trick.
(Code)
That’s the end of this tutorial, thanks for having a look, I hope you liked it !
You can use noise to draw all sort of things so I hope you’ll come up with totally different animations 🙂
PS : openSimplex noise isn’t symmetrical and there isn’t any problem when using (radius*cos(TWO_PI*t),radius*sin(TWO_PI*t)) as inputs (since it uses positive and negative values, there will be an undesired effect if the noise is symmetrical – that could be avoided by shifting the circle).
Special thanks to Chris Ball for letting me know about openSimplex noise !
Selection of work from other people inspired by this tutorial
Golan Levin made a gif that explains how a value can be looped with noise :
Also I love those gifs by littlecuuub on tumblr, inspired by the tutorial :

And this one by echophon :

cool post…
LikeLiked by 1 person
Hi – I created this Processing program to help illustrate your trick, using the simplified case of 1D noise. My program does not require Simplex Noise.
Code: https://gist.github.com/golanlevin/46a8fd29114f7a9f41345a9f0ccfd059
Demo GIF: https://giphy.com/gifs/loop-processing-noise-xUOxeU2ELSPeTbevle
LikeLiked by 1 person
Also very practical for noise that literally goes in a circle…
Code: https://gist.github.com/transfluxus/81e75191a7aa7d9e29425c75c1ae055f
Short Video: http://raminsp5vs.tumblr.com/post/168053324117/glowing-climpy-blob-with-opensimplexnoise
LikeLike
I’ve converted Golan’s java processing code into p5.js
https://editor.p5js.org/anotherjesse@gmail.com/sketches/BJLbRp8dm
I’m still learning both this technique and p5, so there might be stupid mistakes, but the conversion was mostly trivial changes for syntax (java -> javascript) and small differences in API between processing and p5.js
Thanks you for the article, and I loved this animation by golan as it made everything click when I saw it moving around the circle.
LikeLiked by 1 person
Bravo!
LikeLike
Great article! I created a tutorial for how to create this same effect in TouchDesigner: https://www.simonaa.media/tutorials/looping-noise-part-1
Thanks for sharing!
LikeLike
Great article ! I’m looking for a 5D noise implementation, do you have any idea if I can find that ?
LikeLike
Glad you liked the article. I don’t know a 5D noise implementation, but I also think it could be useful.
LikeLike